A Comprehensive Guide on How to Screenshot on Windows
Almost everyone knows how to take a screenshot on their smartphones. Unfortunately, the same can’t be said for computers, especially those that run on Windows OS. If you have found yourself in a situation where you need to capture a screenshot on your windows computer, here are eight methods you can follow. These methods how to screenshot on windows apply to both Windows 10 and 11.
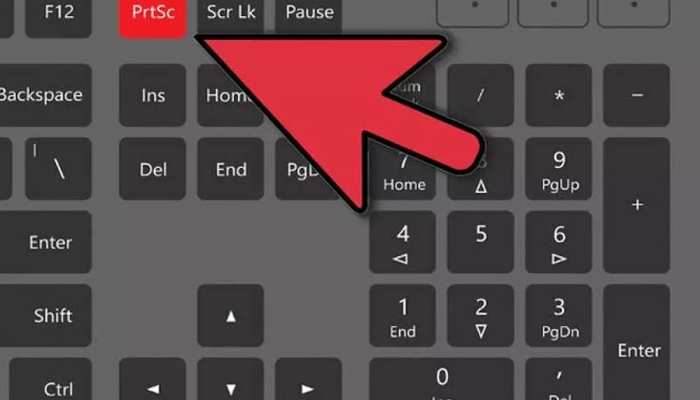
Press the Print Screen Button
Pressing the Print Screen button on your keyboard is the easiest and quickest method of taking a screenshot on your Windows PC. The Print Screen button is sometimes abbreviated as (prt sc). When you press this button, the screenshot is often saved on your clipboard, and you can paste it on Word, Paint, or any other app. You can also view screenshots taken through Print Screen by pressing Windows Key + V.
Windows Key + Print Screen
If you want to save the screenshot on your windows computer, you should press the Windows key + Print Screen. Immediately after pressing this combination, your screen will dim for a second, and the screenshot will be saved in the pictures section in File Explorer. Alternatively, depending on your current settings, it can also be saved on your OneDrive.
Alt + Print Screen
There are certain scenarios where you may be interested in a screenshot of only the active window. You can take this shot by pressing Alt + Print Screen. Please note that the image won’t be automatically saved on your PC. It will be on the clipboard and should be saved on another app.
You Can Use the Snip & Sketch Tool
Not many computer owners are aware of this nifty tool on Windows 10. The Snip & Sketch tool allows you to customize your screenshot. Using the free-form rectangular window that pops up when you activate this tool, you can take a full screenshot or a part of your screen. The Snip & Sketch tool is activated by pressing Windows Key + Shift + S.
It’s worth mentioning that the Snip & Sketch tool doesn’t automatically save the screenshot. It’s only copied to the clipboard. You can preview the image and save or share it.
The Snipping Tool
In Windows 11, the Snip & Sketch tool is replaced by the Snipping tool. It’s activated using similar commands, which are Windows Key + Shift +S. when you key in these commands, a screenshot toolbar will appear. You can then capture the screenshot and preview it right away. Or you can view it later in the Picture folder because, in Windows 11, screenshot images are saved directly.
Power + Volume Up
Most of us are used to this method because it’s similar to the one in Android smartphones. Some computers can allow you to capture a screenshot by pressing the power button + the volume up button. You can press the Windows Key + volume down button if that doesn’t work.
The Game Bar
This method of taking screenshots using the game bar is very popular amongst PC gamers. But anyone can use it to take screenshots and even record videos.
To enable the game bar, press the Windows logo + G. For it to be enabled, you must activate it in the settings app. If it doesn’t pop up, navigate to settings, Xbox game bar, and switch it on.
When you enable the game bar, look for the camera icon and click on it. You will have successfully taken a screenshot on your Windows PC. These screenshots can be viewed in the game bar gallery or File Explorer under the Captures folder.
Use Third-Party Screenshot Tools
Alternatively, you can always use third-party screenshot tools if you don’t like the options offered by Windows OS. Here are some popular Screenshot apps for windows;
• ScreenRec – This isn’t your typical screenshot app. It allows you to record videos, add notes on recordings and even share screenshot links with others.
• Greenshot – It’s another nifty screenshot app that allows you to edit your images. This tool also has a feature that can take screenshots of a scrolling web page.
• Screencast-O-Matic – It is ranked as the number one screenshot app and desktop recorder. It is easy to use and offers users plenty of editing tools.
• Snagit – With this tool, you won’t only be able to take screenshots. But you can also make animated GIFs.
• Lightshot – This is an advanced version of the Print Screen Button because it also edits images.
There are so many ways on how to screenshot on Windows PC. All you have to do is go through the methods listed above and find one that seems best for you.


